Repository
This Guide explains how to add own Extensions to our Repository.
Contents
Setting up your Account
- First, get an account at our Support Board
- Next, go to the Repository and login with your Board-Account
- You are now redirected to your personal settings page.
- You have to enable the Twofactor-Authentification in order to use the Repository. This is for security purposes.
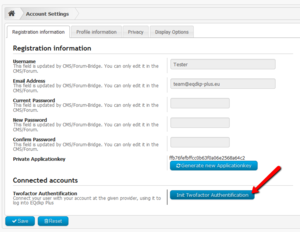
- Click on the Button "Init Twofactor Authentification", see Screenshot on the right
- For the Twofactor-Authentification, you need an App that is compatible with RFC6238, e.g. the Google Authenticator. Or you can download the PHP-File, see #Links
- Scan the Barcode or insert the Secret
- The App will generate a Token for the Repository
- Insert the Token to finish the Initiation
- If everything works, your account now has Twofactor Authentification.
Adding an Extension
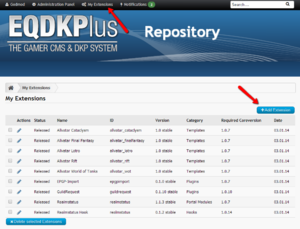
- On top of the page, right to your username, you find the Link to Manage your Extensions.
- You will see a list of your Extensions, and the status Information. There are four states:
- New - Your extension is new and not proofed and released by the Devs
- Checking - Your extensions is being checked
- Released - Your extension was released by the Dev-Team
- Rejected - Your extension was rejected. You should have get an email with more details about the rejection.
- Click on "Add Extension" to add your extension
- You will find a form with many fields. This are the important ones:
- folderid - This is the unique name of your extension. For example, if your created a Plugin called "Shoutbox" and you named the plugin folder "shoutbox", the Folder-ID is the foldername, here "shoutbox".
- Name and Description - Tell the people what your Extension does and what features it has
- Category - Select the right Category for your extension. If you have not the right Category, that can cause Problems for the User
- Demo - If you have a Demo-Page, insert the URL so the People can try out
- Version - Insert the Version of your Extension, e.g. 1.0.3. Everytime you update your extension, you should also update the Version, otherwise the User won't get an Notification about the Update
- File - Upload the zip-File with your Extension. You don't have to include a package.xml, because the package.xml will be created from the Repositor and added to your File.
Your Extension is your in the Repository, but it has to be reviewed and released by the Dev-Team. They will get an automated notification about your new extension.
Updating an Extension
For editing your Extension, go to "My Extensions" and click on the edit-Symbol. Everytime you upload a new version of your Extension, the Status will be set to "New". Also, you should update and increase the Version Number of the Extension, because the User won't get a notification if the number stays the same or is lower than the version the user have installed.
Releasing an Extension
This Part is only for Developer that are in the Groups "EQdkp Plus Team" or "Trusted Developer". Members of this groups can release their Extensions without having to wait for the EQdkp Plus Team.
Here is the workflow for releasing an Extension:
- Add your Extensions as described in #Adding an Extension
- Edit your Extension. Scroll to the end of the Page. You will notice that there is a field called "SHA1-Hash". Copy this Hash to your Clipboard, you will need it.
- Open the Signer (See Link-Section).
- Insert the copied SHA1-Hash into the Field "SHA1-Hash"
- Select the private Key file you got from the EQdkp Dev Team
- Click on "Sign File"-Button
- Copy the Signature from Signer into the Repository field below the SHA1-Hash, named "A digital Signature of the SHA1-Hash"
- Do the same (creating a signature) for the "SHA256-Hash" and add the created signature into the appropriate field
- Click on "Save"
Your Extensions is now released.
Links
Here we have some usefull links
- Google Authenticator in Google Play Store
- Google Authenticator in iTunes
- File:Google authenticator.zip Insert the Secret in the php File. Do not allow public access to this file!
- Signer Creates Signatures for Hashes (HTML or php File) Do not allow public access to this file and your private Key!


