Installation
Requirements
Webspace
- php Version 5.6 or higher
- MySQL-Database Version 5 or higher
- at least 64MB RAM for PHP, better 128MB
php-Functions
- zLib Extension
- zipArchive Class
- curl enabled
- fopen enabled
- autoload Function enabled
- json Extension
- GD Extension
- Multibyte (MB) Extension
- Hash Function
- XML Extension
- OpenSSL Extension
Preparations
- Download the EQdkp Plus package: Download
- Unzip the downloaded package on your local PC, e.g. using WinZip, 7Zip, ...
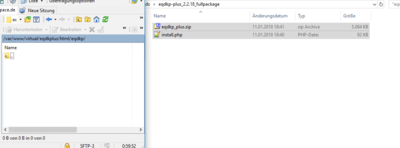
- Upload both files (one zip-Archive eqdkp_plus.zip and one install.php) into the desired folder on your webspace
- Alternative for dowloading and extracting (if you have command line access):
cd to the folder you want to install EQdkp Plus
[isabell@stardust ~]$ cd ~/html/
[isabell@stardust html]$ curl -L https://eqdkp-plus.eu/repository/download/latestcore -o eqdkp-plus.zip
 % Total    % Received % Xferd  Average Speed   Time    Time     Time  Current
                                Dload  Upload   Total   Spent    Left  Speed
 100 25565    0 25565    0     0  22942      0 --:--:--  0:00:01 --:--:-- 22948
 100 5138k  100 5138k    0     0   769k      0  0:00:06  0:00:06 --:--:-- 1108k
[isabell@stardust html]$ unzip eqdkp-plus.zip && rm eqdkp-plus.zip
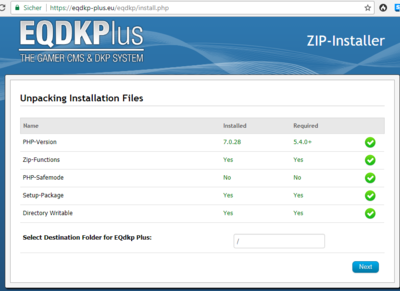
[isabell@stardust html]$- Navigate to the uploaded install.php in your Browser. If you have uploaded the files into the subfolder "eqdkp", navigate to www.deinedomain.de/eqdkp/install.php. The install.php is just a ZIP-Installer, that means it just unzips the ZIP Archive so you don't have to upload all files manually.
- Now the EQdkp Plus Archive will get unzipped, and you will be redirected to the Installation assistant
- If the archive cannot be unziped, you have to unzip the uploaded file eqdkp_plus.zip locally on your PC and upload all files into the desired subfolder of your webspace. After hat, navigate in your browser to the Installation assistant, e.g. www.deinedomain.de/eqdkp/install/
Installation assistant
The Installation assistant is available after the ZIP-Installer has unziped the archive. It is available at the folder /install/, and you should be redirected automatically to it.
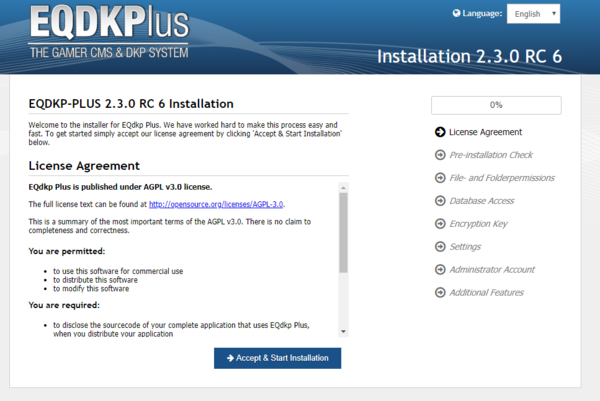
Step 1 - License Agreement
EQdkp Plus is published under AGPL v3.0 license. You have to accept this license in order to install EQdkp Plus.
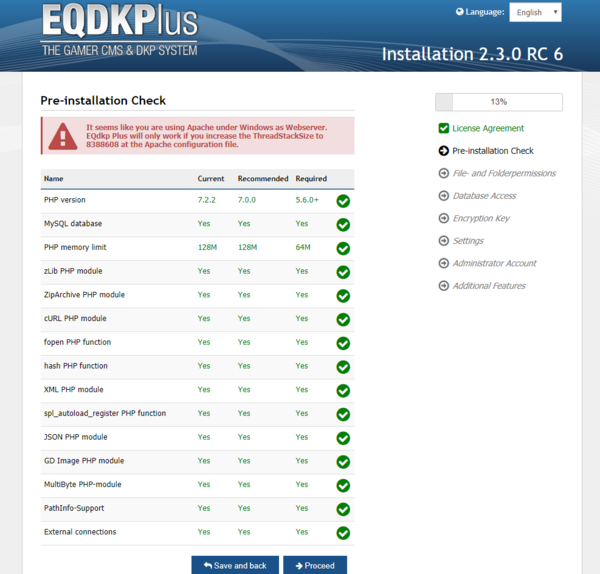
Step 2 - Pre-installation Check
Here, the requirements for the Installation will be checked. If some requirements are not met, an installation of EQdkp Plus is not possible.
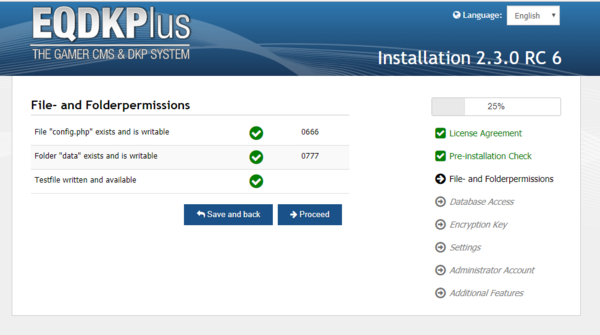
Step 3 - File- and Folderpermissions
This step checks, if the folder permissions have been set correctly, so that EQdkp Plus has writing permissions to some directories.
Also, it will be checked if the webserver supports PATH_INFO.
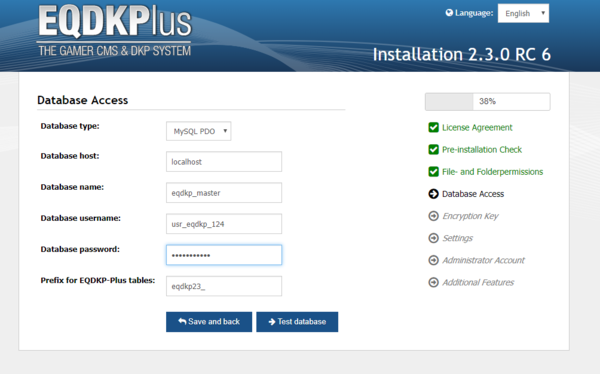
Step 4 - Database Access
Here you must enter all details for your database connection. Currently the databases MySQL and MariaDB are supported.
Insert the connection data and credentials:
- Database type: MySQL PDO (if available), otherwise MySQLi
- Database host: the IP/Hostname to your database server, can also be "localhost" if the database server is on the same system
- Database name: the name of the database. Most likely you have created a new database for EQdkp Plus
- Database username: username of the database user
- Database password: password of the database user
- Prefix for EQDKP-Plus tables: change the prefix, if you want to install more EQdkp Plus into one database
The required connection data and credentials will be provided by your hoster, normally at a management page. They will stored at the config.php of your EQdkp Plus installation.
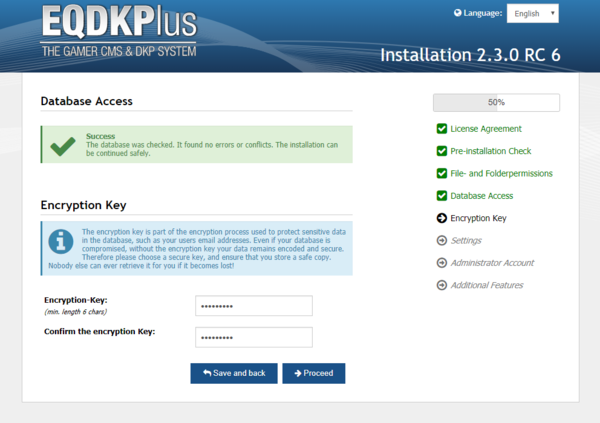
Step 5 - Encryption Key
Some data will be encrypted at the database, like email addresses of user. This protects the data if there is a security breach. Therefore, choose an encryption key and not it down somewhere, e.g. in a password safe. The encryption key will be saved in a hashed way at a config.php.
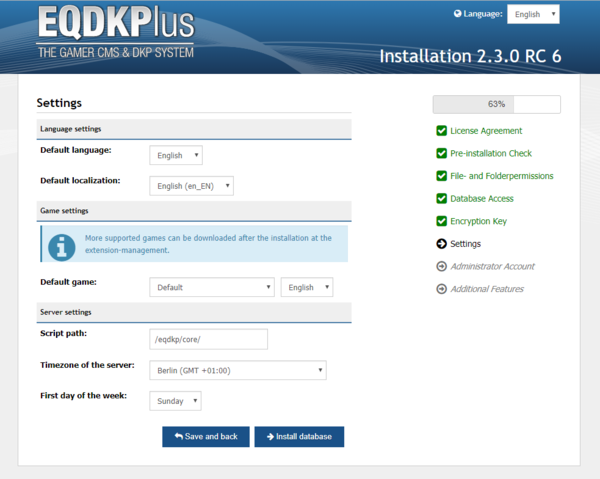
Step 6 - Settings
Insert here some basic settings for your system. EQdkp Plus will be provided with a basic game only. You can install other games using the extension management after the installation.
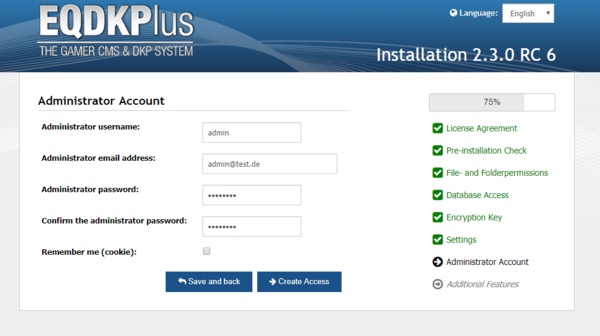
Step 7 - Administrator Account
Insert the username and password for the administrator account. Of couse you can add additional administrators after the installation. Please choose a long and safe password for this account. You can also add additional authentication features like two-factor authentication after the installation.
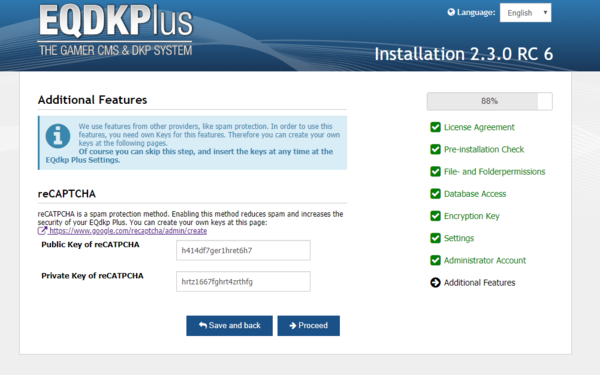
Step 8 - Additional Features
We use some external services, e.g. for spam protection. You need some free keys for this, which can be gathered over the website of the service provider. After you get this keys, you can insert them into the fields. You can also get and insert the keys after the installation.
After the installation
After the installation you will be redirected to the maintenance area of EQdkp Plus. There you can start a tour through EQdkp Plus, if you don't know EQdkp Plus yet.
